Install ImageMagick PHP extension in Windows

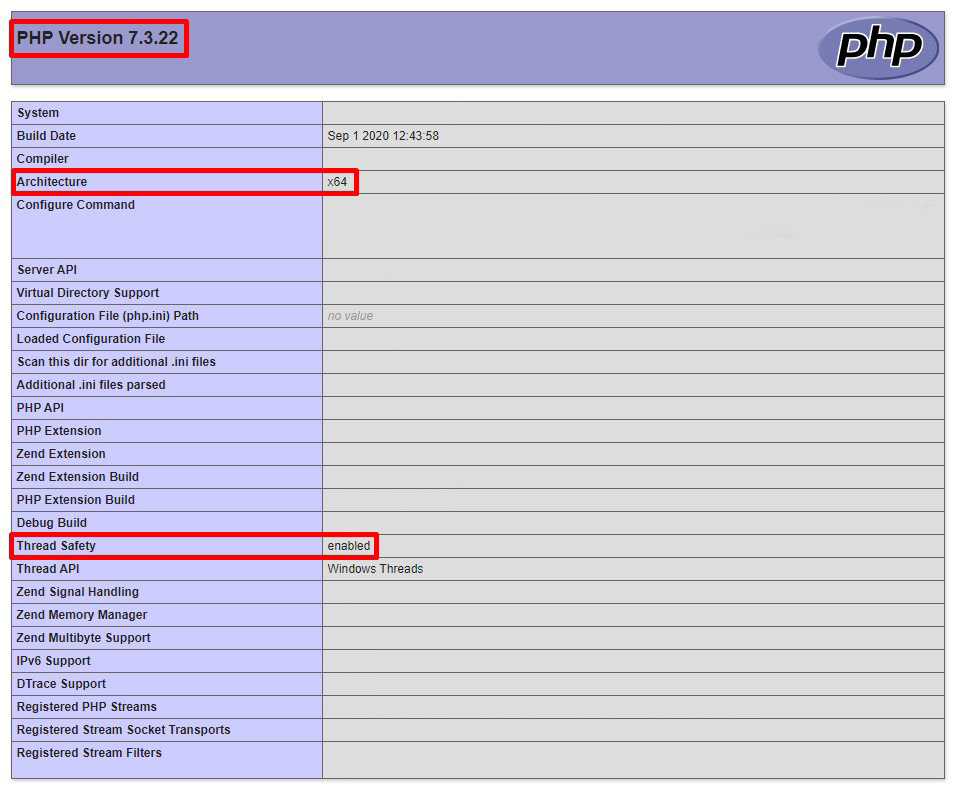
Before install Imagick PHP extension, you need to check the detail of PHP configuration, PHP Version, Thread Safety, and Architecture

You can use phpinfo() function.

Take a look the picture below:

Once you get the detail of PHP configuration, you can download the .dll files of the PHP extension and ImageMagick archive using the following table:

PHP Version Thread Safe Architecture Extension ImageMagick
5.5 Yes x86 php_imagick-3.4.3-5.5-ts-vc11-x86.zip ImageMagick-6.9.3-7-vc11-x86.zip
5.5 Yes x64 php_imagick-3.4.3-5.5-ts-vc11-x64.zip ImageMagick-6.9.3-7-vc11-x64.zip
5.5 No x86 php_imagick-3.4.3-5.5-nts-vc11-x86.zip ImageMagick-6.9.3-7-vc11-x86.zip
5.5 No x64 php_imagick-3.4.3-5.5-nts-vc11-x64.zip ImageMagick-6.9.3-7-vc11-x64.zip
5.6 Yes x86 php_imagick-3.4.3-5.6-ts-vc11-x86.zip ImageMagick-6.9.3-7-vc11-x86.zip
5.6 Yes x64 php_imagick-3.4.3-5.6-ts-vc11-x64.zip ImageMagick-6.9.3-7-vc11-x64.zip
5.6 No x86 php_imagick-3.4.3-5.6-nts-vc11-x86.zip ImageMagick-6.9.3-7-vc11-x86.zip
5.6 No x64 php_imagick-3.4.3-5.6-nts-vc11-x64.zip ImageMagick-6.9.3-7-vc11-x64.zip
7.0 Yes x86 php_imagick-3.4.3-7.0-ts-vc14-x86.zip ImageMagick-6.9.3-7-vc14-x86.zip
7.0 Yes x64 php_imagick-3.4.3-7.0-ts-vc14-x64.zip ImageMagick-6.9.3-7-vc14-x64.zip
7.0 No x86 php_imagick-3.4.3-7.0-nts-vc14-x86.zip ImageMagick-6.9.3-7-vc14-x86.zip
7.0 No x64 php_imagick-3.4.3-7.0-nts-vc14-x64.zip ImageMagick-6.9.3-7-vc14-x64.zip
7.1 Yes x86 php_imagick-3.4.4-7.1-ts-vc14-x86.zip ImageMagick-6.9.3-7-vc14-x86.zip
7.1 Yes x64 php_imagick-3.4.4-7.1-ts-vc14-x64.zip ImageMagick-6.9.3-7-vc14-x64.zip
7.1 No x86 php_imagick-3.4.4-7.1-nts-vc14-x86.zip ImageMagick-6.9.3-7-vc14-x86.zip
7.1 No x64 php_imagick-3.4.4-7.1-nts-vc14-x64.zip ImageMagick-6.9.3-7-vc14-x64.zip
7.2 Yes x86 php_imagick-3.4.4-7.2-ts-vc15-x86.zip ImageMagick-7.0.7-11-vc15-x86.zip
7.2 Yes x64 php_imagick-3.4.4-7.2-ts-vc15-x64.zip ImageMagick-7.0.7-11-vc15-x64.zip
7.2 No x86 php_imagick-3.4.4-7.2-nts-vc15-x86.zip ImageMagick-7.0.7-11-vc15-x86.zip
7.2 No x64 php_imagick-3.4.4-7.2-nts-vc15-x64.zip ImageMagick-7.0.7-11-vc15-x64.zip
7.3 Yes x86 php_imagick-3.4.4-7.3-ts-vc15-x86.zip ImageMagick-7.0.7-11-vc15-x86.zip
7.3 Yes x64 php_imagick-3.4.4-7.3-ts-vc15-x64.zip ImageMagick-7.0.7-11-vc15-x64.zip
7.3 No x86 php_imagick-3.4.4-7.3-nts-vc15-x86.zip ImageMagick-7.0.7-11-vc15-x86.zip
7.3 No x64 php_imagick-3.4.4-7.3-nts-vc15-x64.zip ImageMagick-7.0.7-11-vc15-x64.zip
7.4 Yes x86 php_imagick-3.4.4-7.4-ts-vc15-x86.zip ImageMagick-7.0.7-11-vc15-x86.zip
7.4 Yes x64 php_imagick-3.4.4-7.4-ts-vc15-x64.zip ImageMagick-7.0.7-11-vc15-x64.zip
7.4 No x86 php_imagick-3.4.4-7.4-nts-vc15-x86.zip ImageMagick-7.0.7-11-vc15-x86.zip
7.4 No x64 php_imagick-3.4.4-7.4-nts-vc15-x64.zip ImageMagick-7.0.7-11-vc15-x64.zip

After download the right archive, follow below steps to installing process :

  1. Extract ImageMagick-(any).zip. Copy .dll files located in bin. Application extention file name start with CORE_RL and IM_MOD_RL. Paste them in PHP root directory where you have php.exe.
  2. Extract php_imagick-(any).zip. Copy php_imagick.dll files located in bin and paste it in ext folder in PHP directory.
  3. Open php.ini file located in PHP root directory. Add extension=php_imagick.dll in php.ini
  4. Restart the Apache

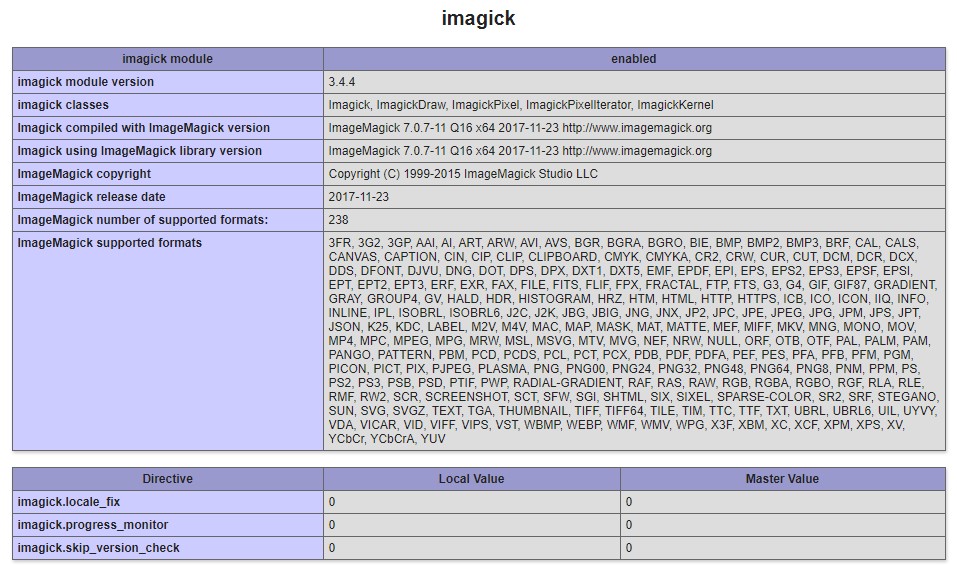
You can check again phpinfo to see is Imagick successfully installed

You will get PHP configuration like below picture it Imagick successfully installed: